 Pin It
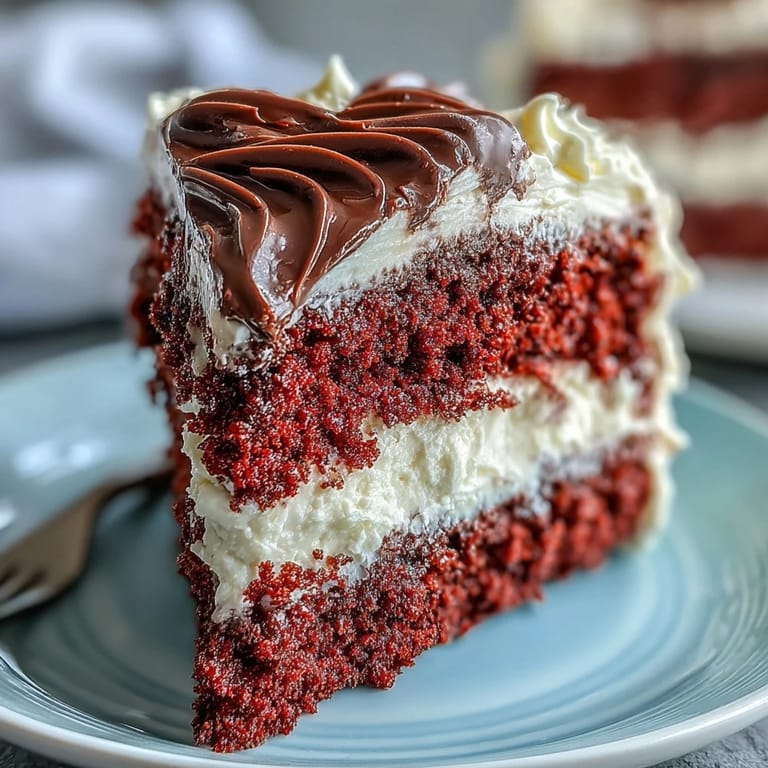
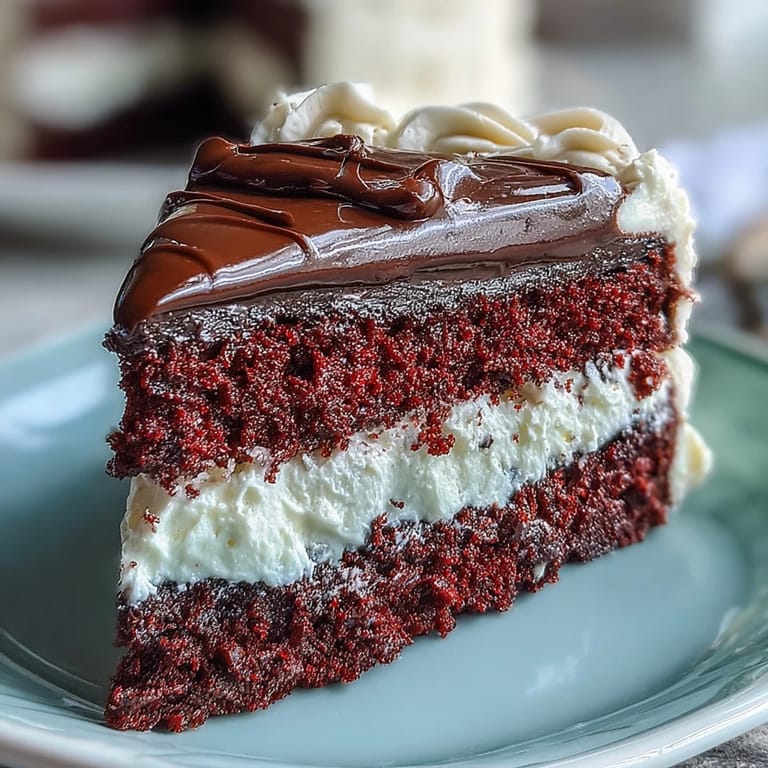
 My neighbor walked into my kitchen last Valentine's Day holding a plastic Betty Boop figurine and asked if I could turn it into a cake. I laughed until I realized she was serious. That strange request led me to this red velvet heart cake topped with a crisp dark chocolate silhouette, and honestly, it became one of my proudest baking moments. The contrast between the soft, tangy crumb and that snappy chocolate cutout makes every slice feel like opening a gift.
I made this for a friend's birthday brunch, and when I set it on the table, everyone went silent for a beat before the camera phones came out. The Betty Boop shape sparked so much nostalgia that we spent half an hour swapping cartoon memories before anyone even cut a slice. It reminded me that sometimes the best recipes are the ones that start conversations, not just satisfy sweet cravings.
Ingredients
- Cake flour: Sifting this guarantees a cloud-like crumb that melts on your tongue instead of sitting heavy.
- Natural unsweetened cocoa powder: Just enough to deepen the red color without making it taste like chocolate cake.
- Baking powder and baking soda: The double leavening gives you that signature tender rise, especially when the vinegar activates the soda.
- Fine sea salt: A small pinch sharpens every other flavor and keeps the sweetness in check.
- Unsalted butter, room temperature: Cold butter will never cream properly, so let it sit out for at least an hour.
- Granulated sugar: Creaming this with butter traps air and builds the structure for a light, fluffy cake.
- Large eggs, room temperature: Cold eggs can shock the batter and cause it to curdle, so plan ahead.
- Buttermilk, room temperature: The acid in buttermilk tenderizes the gluten and gives you that classic tangy velvet flavor.
- Red gel food coloring: Gel won't water down your batter like liquid dye, and the color stays vivid after baking.
- Pure vanilla extract: Use the real stuff for warmth and depth that imitation can't match.
- White vinegar: This reacts with baking soda to create tiny air pockets that make the crumb impossibly soft.
- Cream cheese, room temperature: Cold cream cheese turns lumpy no matter how long you beat it, so patience here pays off.
- Powdered sugar, sifted: Sifting prevents gritty frosting and makes spreading a breeze.
- Dark chocolate or candy melts: Dark chocolate sets firm and snaps cleanly, perfect for lifting a delicate silhouette off parchment.
Tired of Takeout? 🥡
Get 10 meals you can make faster than delivery arrives. Seriously.
One email. No spam. Unsubscribe anytime.
Instructions
- Prep Your Pans:
- Preheat your oven to 350°F and grease those heart-shaped pans generously, then line the bottoms with parchment. This double insurance means your cakes will pop out cleanly every time.
- Mix the Dry Ingredients:
- Whisk together the cake flour, cocoa powder, baking powder, baking soda, and salt in a medium bowl. Set it aside while you work on the wet ingredients.
- Cream Butter and Sugar:
- Beat the room-temperature butter in your stand mixer for about a minute until it's creamy, then gradually add the sugar. Keep beating for 2 to 3 minutes until the mixture looks pale and fluffy, like soft clouds.
- Add Eggs One at a Time:
- Crack in one egg, beat on low just until blended, then add the next. Scrape down the bowl sides between additions so nothing hides at the bottom.
- Color and Flavor the Batter:
- Stir in the red gel food coloring, vanilla extract, and white vinegar until the batter turns a deep, even red. The vinegar smell will fade completely during baking.
- Alternate Dry and Wet:
- With the mixer on low, add one-third of the dry ingredients, then half the buttermilk, mixing just until you can't see streaks. Repeat with another third of dry, the rest of the buttermilk, and finish with the last of the dry ingredients.
- Activate the Baking Soda:
- In a small cup, stir together 1 teaspoon vinegar and the baking soda, then gently fold it into the batter. You'll see it foam up slightly, which is exactly what you want for a light crumb.
- Fill and Bake:
- Divide the batter evenly between your prepared pans and smooth the tops with an offset spatula. Bake on the center rack for 25 to 30 minutes, until a toothpick poked in the center comes out clean.
- Cool the Cakes:
- Let the cakes rest in their pans for 10 minutes, then run a thin knife around the edges and invert them onto wire racks. Peel off the parchment and let them cool completely before you even think about frosting.
- Make the Cream Cheese Frosting:
- In a clean mixer bowl, beat the room-temperature cream cheese and butter together for 2 minutes until smooth. Gradually add the powdered sugar and a pinch of salt, then the vanilla, beating on low until the frosting is fluffy and spreadable.
- Level and Layer:
- If your cakes domed, use a serrated knife to level the tops. Place one heart layer on a cake board, pipe or spread about three-quarters of a cup of frosting over it, then top with the second layer and press gently.
- Crumb Coat:
- Apply a thin layer of frosting all over the cake to seal in crumbs, then chill for 10 minutes. This step makes your final coat look smooth and professional.
- Final Frosting Layer:
- Spread a final, thicker layer of frosting over the chilled crumb coat. Use an offset spatula to create swirls or keep it smooth, whatever mood you're in.
- Create the Betty Boop Silhouette:
- Place your printed stencil under a sheet of parchment, then pipe or brush melted dark chocolate over the outline. Let it set at room temperature or pop it in the fridge for 10 minutes until firm.
- Add the Silhouette:
- Carefully peel the chocolate shape off the parchment and lift it onto the center of your frosted cake. Press gently so it sticks to the frosting without cracking.
- Final Touches and Chill:
- Decorate the edges with frosting rosettes, edible glitter, or red sugar pearls if you like. Chill the whole cake for 30 minutes before serving to let the frosting set, and slice with a warm, clean knife for neat heart-shaped pieces.
 Pin It
 The first time I peeled that chocolate silhouette off the parchment without it cracking, I actually cheered out loud in my empty kitchen. It felt like a tiny victory, proof that patience and a steady hand can turn a quirky idea into something beautiful. Now, every time I make this cake, I remember that small burst of pride and the way my friend's eyes lit up when she saw her cartoon hero perched on top of all that red velvet softness.
Getting That Vibrant Red
I used to think any red food coloring would work until I ended up with a muddy pink cake that looked more sad than festive. Gel-based coloring changed everything because it's concentrated enough to give you that bold, true red without thinning your batter. Start with the amount listed, then add a bit more if you want it even brighter, but remember the color deepens as it bakes.
Working With Heart-Shaped Pans
Heart-shaped pans can be tricky because the point tends to bake faster than the rounded top. I rotate my pans halfway through baking and keep a close eye on that narrow tip to avoid over-browning. If you don't own heart pans, you can bake this in two 9-inch round pans and carve them into hearts after they cool, though it takes a bit more patience and a sharp serrated knife.
Storing and Serving
This cake keeps beautifully in the fridge for up to four days if you cover it loosely with plastic wrap or store it in a cake keeper. The cream cheese frosting stays creamy and the red crumb actually gets more tender as it sits. Let slices come to room temperature for about 15 minutes before serving so the frosting softens and the flavors open up.
- Warm your knife under hot water and wipe it dry between slices for clean, professional-looking pieces.
- If you're traveling with this cake, keep the chocolate silhouette separate and add it just before serving to avoid breakage.
- Leftover frosting can be stored in an airtight container in the fridge for up to a week and used on cupcakes or cookies.
 Pin It
 Every time I set this cake on the table, someone asks for the recipe, and I love watching their faces when they realize how simple it actually is. It's proof that a little creativity and a lot of butter can turn an ordinary dessert into a memory.
Recipe FAQs
- → What makes the red color so vibrant?
Gel-based food coloring provides the most vibrant red hue without altering the batter consistency or texture. Liquid coloring can thin the batter, while gel delivers concentrated color with minimal product needed.
- → Can I make this cake in advance?
Yes, the unfrosted layers can be wrapped in plastic and frozen for up to 3 months. The frosted cake keeps well refrigerated for up to 4 days. The chocolate silhouette should be added within 24 hours of serving for optimal texture contrast.
- → Why is vinegar added to the batter?
White vinegar activates the baking soda, creating a slight foam that lightens the crumb structure. This chemical reaction is essential for achieving the characteristic soft, velvety texture of red velvet.
- → How do I prevent the chocolate silhouette from breaking?
Ensure the chocolate is completely set before peeling from the parchment. Work in a cool room, and lift carefully using an offset spatula. If it cracks, simply pipe over the break with melted chocolate and let set again.
- → Can I use regular cocoa powder instead of natural?
Natural unsweetened cocoa powder is preferred as it provides a subtle chocolate flavor without overpowering the classic tangy profile. Dutch-processed cocoa can be used but may result in a slightly different taste balance.
- → What if I don't have heart-shaped pans?
You can bake the batter in two 9-inch round pans and carve heart shapes after cooling, or use a heart-shaped cutter on sheet cake layers. Alternatively, create the heart effect with creative frosting on standard rounds.