 Pin It
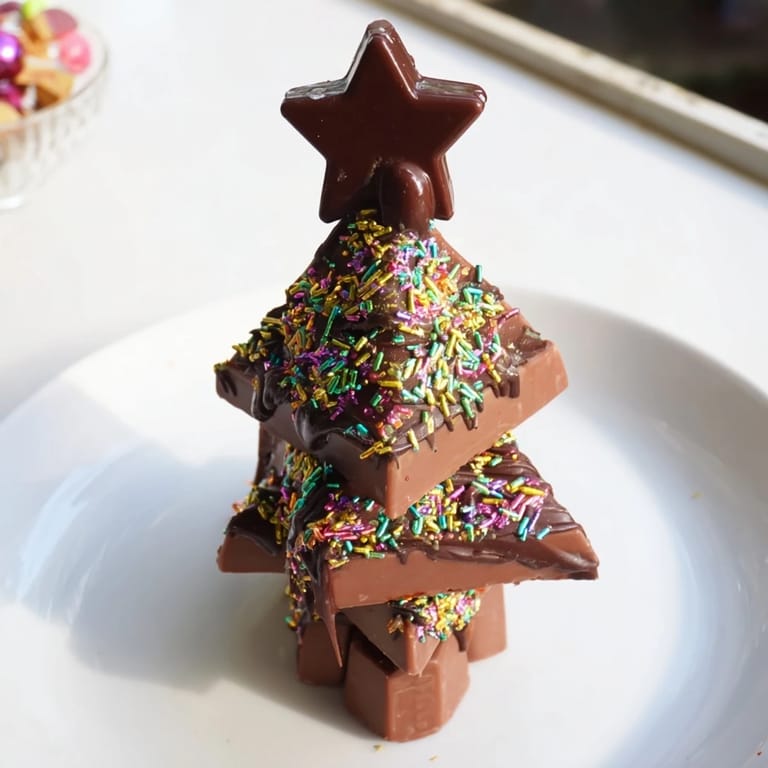
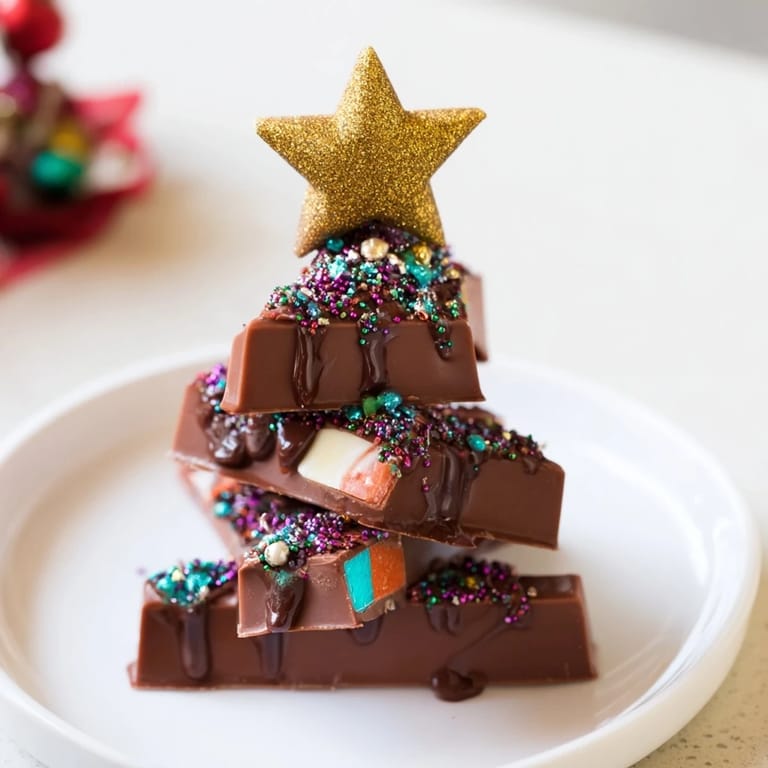
 My daughter spotted them in a fancy chocolate shop window and insisted we recreate them at home—those whimsical little chocolate trees stacked like edible sculptures. What started as a rainy Sunday project became our December tradition, the kind where flour dusts the counter and everyone's fingers end up sticky with melted chocolate. The beauty of these trees is how forgiving they are; you can stack them however feels right, and the drizzle covers any imperfect angles. Now whenever the holidays roll around, she asks to make them again, and I watch her carefully arrange those little Kinder bars like she's building something sacred.
I learned the magic of these when I brought them to a holiday potluck thinking they'd be overshadowed by fancier desserts, but people kept coming back for more, asking how I'd made something so elegant look so simple. It was the combination of that glossy chocolate drizzle catching the light and the festive glitter scattered across the top—suddenly our kitchen felt like a professional chocolate shop. My partner stood by with a camera, snapping photos before anyone could eat them, and I realized these little treats had become something more than dessert; they were part of the celebration itself.
Ingredients
- 24 mini Kinder chocolate bars: The foundation of your trees, and they're essential because their rectangular shape stacks naturally—any mini chocolate bar works, but Kinder bars have that perfect size and satisfying weight that makes the stacking feel intentional.
- 150 g dark or milk chocolate, chopped: This is your decorative canvas, the element that transforms simple stacks into something that looks like it came from a chocolatier's hands.
- 1 tsp coconut oil: A small secret that makes the melted chocolate flow like silk instead of seizing up; completely optional but genuinely transforms the drizzle.
- 3 tbsp festive sprinkles or edible glitter: This is where personality lives in the recipe—choose colors that match your mood or your table.
- 8 mini chocolate or candy stars: The crowning moment, the little flourish that makes each tree feel complete.
Tired of Takeout? 🥡
Get 10 meals you can make faster than delivery arrives. Seriously.
One email. No spam. Unsubscribe anytime.
Instructions
- Line your stage:
- Tear off a sheet of parchment paper and lay it across your baking tray—this prevents the chocolate from sticking and makes cleanup feel effortless afterward.
- Unwrap and arrange:
- Unwrap all those little bars and start stacking them directly on the parchment, arranging them however feels natural to create a tree silhouette. Some people layer them in a pyramid, others create an asymmetrical forest look; there's no wrong answer here.
- Melt with intention:
- Chop your chocolate and place it in a heatproof bowl over simmering water, stirring occasionally until it's completely smooth and glossy, or use the microwave in twenty-second bursts if that feels easier. Add that coconut oil if you have it, and watch how it transforms the chocolate into liquid silk.
- Drizzle like you mean it:
- Working quickly while the chocolate is still warm, use a spoon or piping bag to create generous drizzles across each tree stack, letting the chocolate pool slightly between the bars. This is the moment where they transform from simple stacks into something that catches the light.
- Decorate before the set:
- Before the chocolate begins to firm up, scatter your sprinkles or glitter across the wet chocolate and crown each tree with a star—timing matters here because once the chocolate hardens, you're working with dried glue instead of a natural adhesive.
- Chill and settle:
- Slide the tray into the refrigerator for ten to fifteen minutes until the chocolate has set firm and the trees feel solid to the touch.
 Pin It
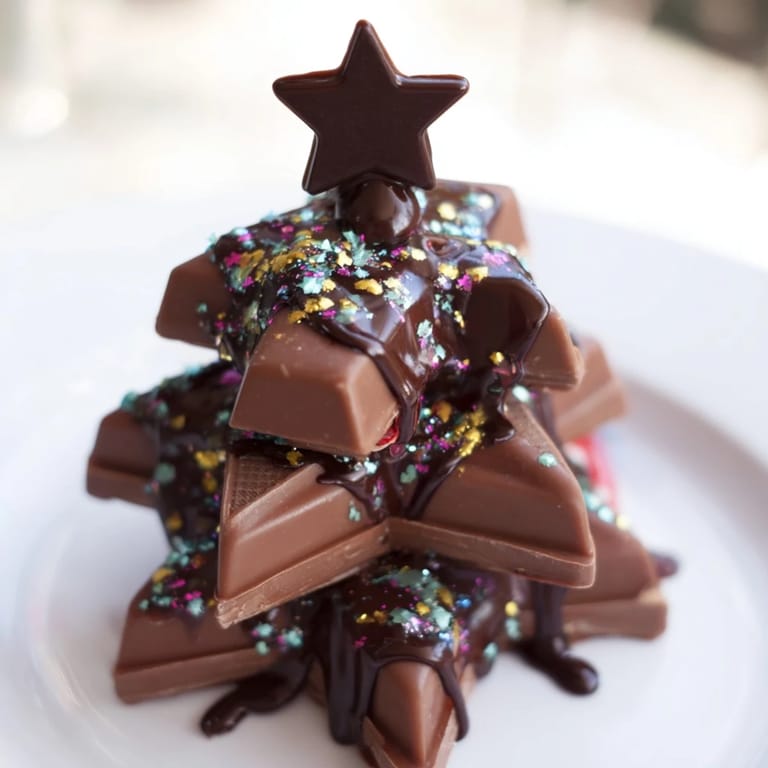
 There's something almost ceremonial about the moment when you pull these from the refrigerator and see the chocolate has set into that perfect glossy finish, the stars catching the kitchen light like tiny ornaments. My mom looked at the finished trees and said they reminded her of something from a luxury chocolatier in Vienna, which made the whole afternoon feel like we'd unlocked some kind of culinary secret, even though we'd barely tried.
Choosing Your Chocolate
The chocolate you choose for drizzling completely changes the personality of these trees—dark chocolate leans elegant and sophisticated, milk chocolate feels festive and playful, and white chocolate creates a stunning contrast if you're using darker bars underneath. I've experimented with all three, and honestly, the choice depends on your mood more than anything else. Each time I make them with different chocolate, they feel like a completely different creation, even though the method stays exactly the same.
Swaps and Substitutions
These trees don't require Kinder bars specifically—I've made them with Ferrero Rocher, those little rectangular chocolate bars from specialty shops, even with homemade fudge cut into blocks when I was feeling ambitious. The only real requirement is that whatever you choose can stack without completely toppling, which gives you incredible freedom to work with what you have. The beauty of this recipe is how it adapts to what's in your pantry or what you can find at your local market.
Storing and Serving
These keep beautifully in an airtight container in a cool corner of your kitchen for up to a week, though they rarely last that long in my house. They're lovely served chilled straight from the refrigerator, but they're equally perfect at room temperature, and they make thoughtful gifts when wrapped carefully in pretty paper. I always make extra because they disappear faster than expected, and honestly, that's the highest compliment a dessert can receive.
- Chill them until just before serving if you want them to hold their shape perfectly for photos.
- Wrap individual trees in parchment paper and tie with ribbon for gifts that feel personal and homemade.
- Store in a cool place away from direct heat to prevent the chocolate coating from softening unexpectedly.
 Pin It
 These little chocolate trees have become how our family marks the start of the season, a small ritual that costs almost nothing and requires only chocolate, patience, and a willingness to let something simple become something special. Make them, and I promise they'll become part of your holiday story too.
Recipe FAQs
- → What type of chocolate works best for drizzling?
Dark or milk chocolate can be used for melting and drizzling, depending on your taste preference.
- → Can I use other mini chocolate bars instead of Kinder?
Yes, any small chocolate bars with a similar size and shape can be substituted for stacking.
- → How do I achieve smooth melted chocolate?
Melting chocolate slowly over a simmering water bath or in brief microwave bursts with optional coconut oil helps maintain a smooth consistency.
- → What decorations complement these chocolate stacks?
Festive sprinkles or edible glitter along with mini chocolate or candy stars add a seasonal touch.
- → How long should the treats be chilled?
Refrigerate for 10 to 15 minutes until the drizzle sets firmly before serving.