 Pin It
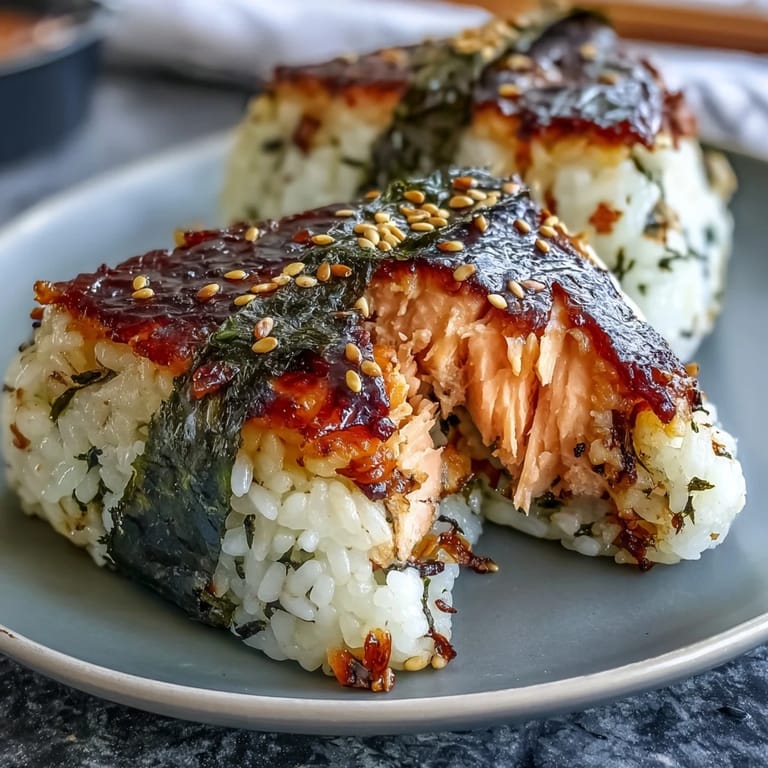
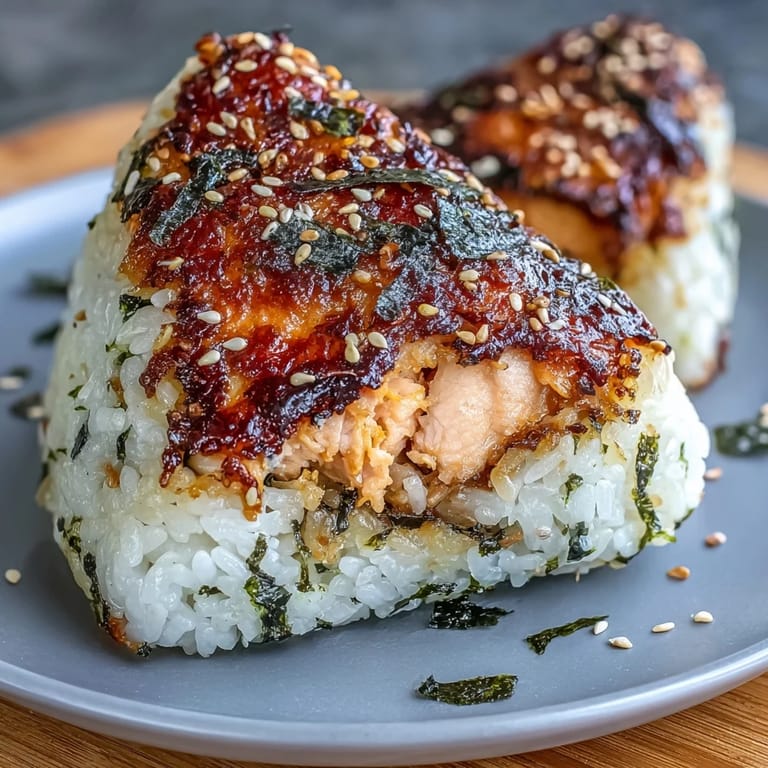
 One humid summer afternoon, the scent of grilling salmon somehow cut through the haze and drifted all the way through my open kitchen window. It was my neighbor, grilling away in her tiny backyard, and that irresistible smell nudged me to finally try my hand at making grilled salmon onigiri. I always associated onigiri with convenience store wrappers or train station snacks in Japan, but making them from scratch brought a mellow calm into my kitchen. The buttery flaked salmon, still warm from the pan, mingled with sticky rice, and the rhythm of shaping each triangle was surprisingly meditative. By the time I crisped them on the skillet, their golden edges glowed like promise.
The first time I brought a plate of these to a park picnic, everyone immediately reached for them—no utensils needed, just hands and napkins. It was surprisingly entertaining to watch everyone compare their onigiri-gripping techniques, jokingly debating whether triangle or oval was more 'authentic', and swapping stories about snacks from their own childhoods. Watching their enjoyment, I realized how something this simple can stir up such lively conversation and laughter.
Ingredients
- Japanese short-grain rice: This is the key—its sticky texture binds the onigiri and ensures a creamy, cohesive bite every time.
- Salmon fillet: Fresh salmon brings a natural, buttery richness; grilling with mirin and soy sauce turns up both sweetness and umami.
- Soy sauce: Just a touch boosts savoriness in both the salmon and, if you brush it on, the crispy crust.
- Mirin: Adds a subtle, rounded sweetness—taste the difference if you skip it!
- Toasted sesame oil: Even a drop gives a nutty depth to the salmon filling.
- Nori (seaweed) sheets: Wrapping each onigiri in nori keeps your hands rice-free and adds a fresh, ocean-bright finish.
- Toasted white sesame seeds: A sprinkle at the end brings gentle crunch and toasty aroma, especially lovely for last-minute flair.
- Rice vinegar (optional): Stirring a dash into the rice gives a gentle tang and gloss, which I always appreciate for balance.
- Water and salt (for shaping): Keeps rice from sticking to your hands and lets you season each onigiri just right.
Tired of Takeout? 🥡
Get 10 meals you can make faster than delivery arrives. Seriously.
One email. No spam. Unsubscribe anytime.
Instructions
- Prepare the rice:
- Pour the rice into a sieve and rinse under cool water, swirling until it runs almost clear. Cook it gently, covered, and let it rest—steamy and fragrant—before seasoning with salt and a little vinegar if you like a tangy note.
- Grill the salmon:
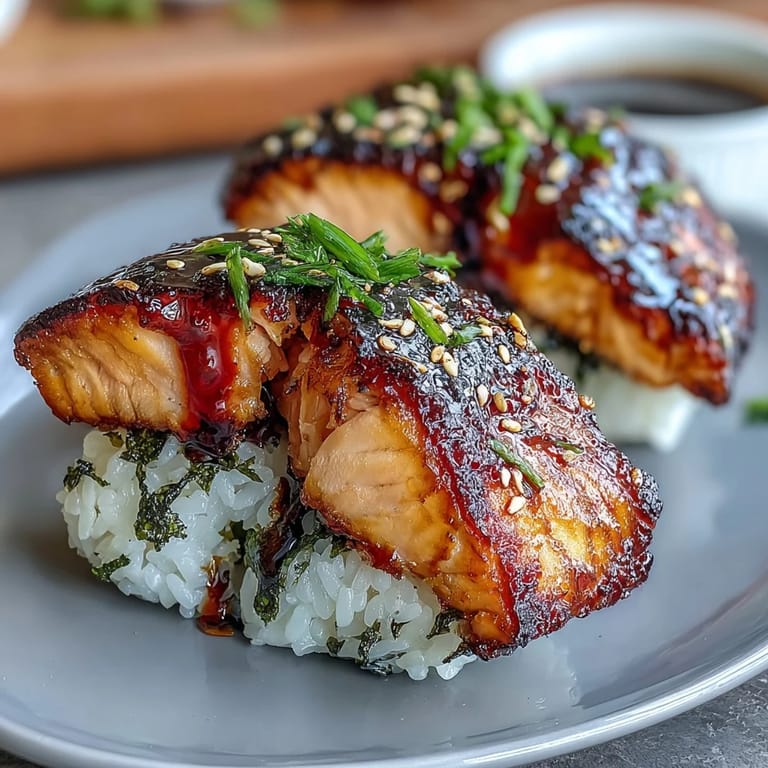
- Coat the salmon in soy sauce, mirin, and toasted sesame oil—don’t forget a pinch of salt and pepper—before grilling until the meat flakes easily with a fork. The kitchen will fill with a sweet-savory aroma that’s nearly impossible to resist.
- Shape the onigiri:
- Wet your hands in cold water, dust with a hint of salt, and scoop warm rice into your palm. Press in a spoonful of salmon, fold gently, and shape it into a snug triangle or oval, enjoying the heat warming your fingers.
- Grill the onigiri:
- Heat a nonstick skillet or grill pan, then carefully crisp each onigiri on both sides until golden, adding a brush of soy sauce for an extra dimension. The sizzle lets you know you’re getting close.
- Wrap and serve:
- Slide each onigiri into a nori wrap, sprinkle with sesame seeds, and serve them warm or cooled—a satisfying snack nearly too pretty to eat.
 Pin It
 At a late-night study session, I once surprised my friends by showing up with a warm batch of these; even the quietest among us broke into a smile at the very first bite. There was something about the aroma of grilled salmon and toasty nori that made even the most stressful night feel lighter.
Picking Perfect Rice Every Time
I learned quickly that Japanese short-grain rice is non-negotiable here—other types just won’t stick right. If you can get your hands on fresh rice, even better, but I found a good soak and rinse makes even supermarket brands behave beautifully.
Getting That Crunch
Grilling or toasting the finished onigiri gives an addictively crisp crust. I found brushing with extra soy sauce halfway through not only deepens flavor, but also creates those irresistible golden blisters on the outside.
Making Onigiri Your Own
There’s no need to stick to salmon—sometimes I toss in pickled plums, leftover teriyaki chicken, or even bits of roasted veggies. Personal tweaks are half the fun, and no two batches ever end up exactly alike.
- Moisten your hands between each onigiri or rice will cling like glue.
- If packing for later, store nori separately to keep it crisp.
- Don’t skip the pinch of salt for shaping—it makes every bite pop.
 Pin It
 I hope you have as much fun making and sharing these grilled salmon onigiri as I always do—they really turn snack time into something special.
Recipe FAQs
- → How do I stop the rice from sticking to my hands?
Keep a small bowl of water handy and wet your palms before shaping each onigiri. Rub a pinch of salt between your palms to lightly season and reduce stickiness for cleaner shaping.
- → Can I use canned salmon instead of fresh?
Yes. Drain canned salmon well, flake it and season with a bit of soy and mirin or lemon. Fresh grilled salmon offers better texture, but canned is a convenient, tasty substitute.
- → What rice is best for these onigiri?
Short-grain Japanese rice yields the ideal sticky texture that holds shape. If unavailable, use a medium-grain variety and reduce rinsing to retain more starch, producing a tackier bite.
- → How long should I sear the onigiri to get a golden crust?
Heat a lightly oiled nonstick skillet over medium. Sear 2–3 minutes per side until golden and slightly crisp. Brush with a little soy before flipping for added caramelized flavor.
- → How should I store and reheat leftovers?
Wrap cooled onigiri individually and refrigerate up to 24–48 hours. Reheat gently in a skillet to revive the crisp exterior or briefly in a microwave, then pan-sear to restore texture.
- → Any tips for gluten-free or allergy-friendly swaps?
Use tamari instead of soy sauce for a gluten-free option and check mirin labels or omit it. Be cautious with nori and sesame if cross-contamination is a concern; verify packaging for allergens.